First Steps
This guide assumes you’ve completed installation. It covers a basic introduction to the main UI and some best practices.
Image generation
After creating a new document, the AI image generation docker should look something like this:
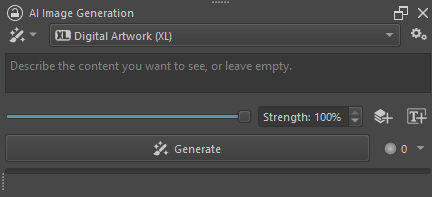
The first thing to do is to enter some text in the text input (prompt) field and click (Shift + Enter). This will ignore any existing content in your canvas and generate a new image of the same size.
Applying results
After the image is generated, it is displayed on the canvas as a preview. It is common to generate multiple images for the same input and select the one that fits best. Results are added to the generation history, where you can quickly select and compare them.
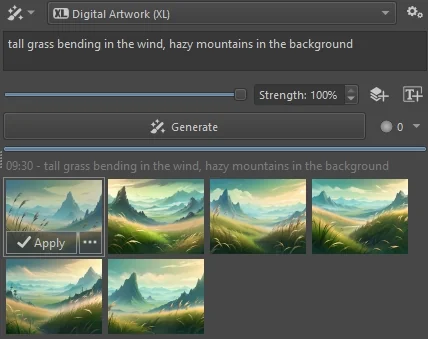
To apply one of the results, click its button, or double-click the thumbnail. This will add the generated result as a new layer on top of the layer stack, and remove the preview. You can apply as many results as you want in order to keep parts or mix them.
Strength
The strength slider controls how much of the canvas content is used in image generation. Note how choosing a value that is less than 100% will change the generate action to , also known as image-to-image. Instead of generating a new image from scratch, the AI model will use the current canvas content as a starting point. Lower strength means less alteration of the existing content.

Read more about Refinement below.
Selections
Creating a selection on the canvas will restrict image generation to the selected area. Note how the generate action changes to when strength is at 100%. This is also known as inpainting. In addition to Fill the dropdown allows you to choose various other actions that influence how surrounding content affects the selected area to be generated. Read more about selection inpainting.
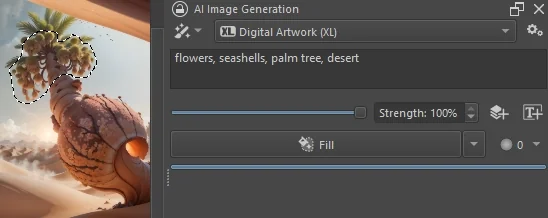
Selections also work with strength at less than 100%, where the generated masked image will always be some variation of the existing content.
Control
One of the biggest challenges when working with image generation is to get it to do what you want. Text prompts are great when you have a vague general idea and don’t care much about the specifics. But when you have a certain composition or style in mind, controlling generation through images is far more intuitive and precise.
This is what control layers are for. You can create them with the button. Read more about Control Layers.
Workspaces
Plugin workspaces can be changed with the toggle button in the top left of the docker. Each is fitted for a specific task.
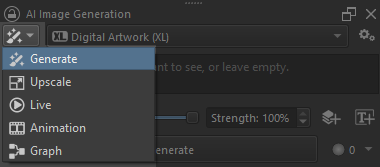
Upscale
Here you have access to super-resolution models. They increase image size while keeping sharp outlines. Compared to diffusion models they deliver predictable and deterministic results without straying too much from the input.
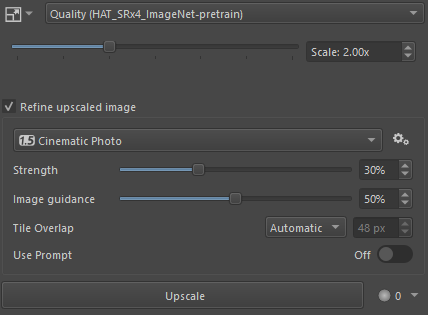
Choose a model and the desired scaling factor. Clicking Upscale will first resize the canvas to the target resolution, then add the generated image as a new layer once it is ready.
Checking the “Refine upscaled image” option will additionally run the selected diffusion model. Instead of processing the entire image at once, it will be split into tiles which are generated one after the other. This can significantly improve quality, but may also introduce unwanted changes.
- Use the “Image guidance” option to keep the output closer to the original.
- If you see tile seams in your image, try increasing “Tile overlap”. Images will take longer to generate, but tile borders become less visible.
Live
Live mode is focused on real-time interaction. Quality is traded for speed by default. The UI is simplified to show a preview of the generated image, which updates as you paint or change parameters. Press the button to start live generation.
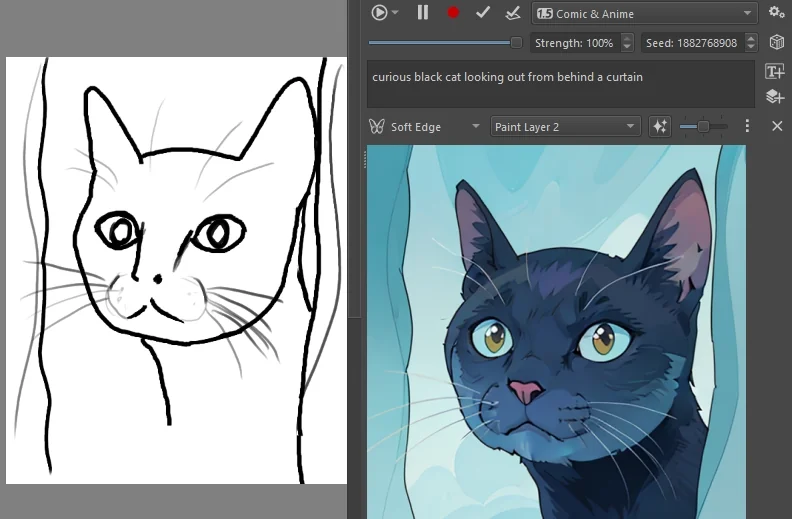
The seed is what usually gives you multiple different results for the same inputs. In live mode it is kept constant, so the image only changes when your input does. Modify the seed to get a different variation of the result.
Custom Graph
This workspace acts as an extension point to ComfyUI. Users familiar with the node graph interface can create custom workflows and automate tasks. Running them directly from Krita allows you to exchange canvas, layer and selection content with ComfyUI.
You can also build custom UI for parametrization! Read more about Custom Graphs.
Animation
The animation workspace supports batch operations on keyframes of specific layers. This allows to transform a series of hand-drawn images in one go.
There is no support for animation models or generating in-between frames at the moment.
Best practices
Refinement
Refinement (image-to-image) is one of the most important concepts when working with AI in Krita. It allows to reliably converge to a desired result by incrementally improving regions of the canvas. Strength can be lowered the closer you get to a final image, and to avoid changing hand-drawn content.
Strength values in the range of 30% to 70% are typically most useful, but this depends on various factors and requires some experimentation. Common uses for refinement are:
- Adding texture, shading and detail to areas in the image
- Removing artifacts or unwanted content while keeping colors and structure
- Style transfer (including making images more realistic or cartoonish)
Generate & Erase
Results are applied as new layers by default. This makes it easy to erase parts of the image that don’t look good, cover something important, or don’t blend well with the surroundings. Use a soft brush to improve transitions between generated fill content.
If there are multiple results with parts you like, try applying them all and erasing the parts you don’t want. It’s a quick way to mix and match different images.
With selection fill, you may notice that generated content extends beyond the selection area somewhat. This results in a smoother transition. The idea is that if you generate a little too much, it is easy to erase. On the other hand, if the fill area is too small, it’s difficult to recreate it at a larger size (the size and shape changes the result). This behavior can be modified by adjusting the “Grow” and “Feather” sliders in Diffusion settings.

Large resolutions
Diffusion models tend to run into performance and memory issues when processing large images. There are however good reasons to use a high resolution canvas:
- Editing a high resolution photo
- Painting significant parts of the image by hand
- Generating more subjects or at higher detail
The plugin’s philosophy is that you shouldn’t have to compromise on quality of your drawing/painting/photos for the sake of image generation. It will automatically crop and resize images to fit technical requirements and keep generation times reasonable. Read more on what it does and how to configure it.
